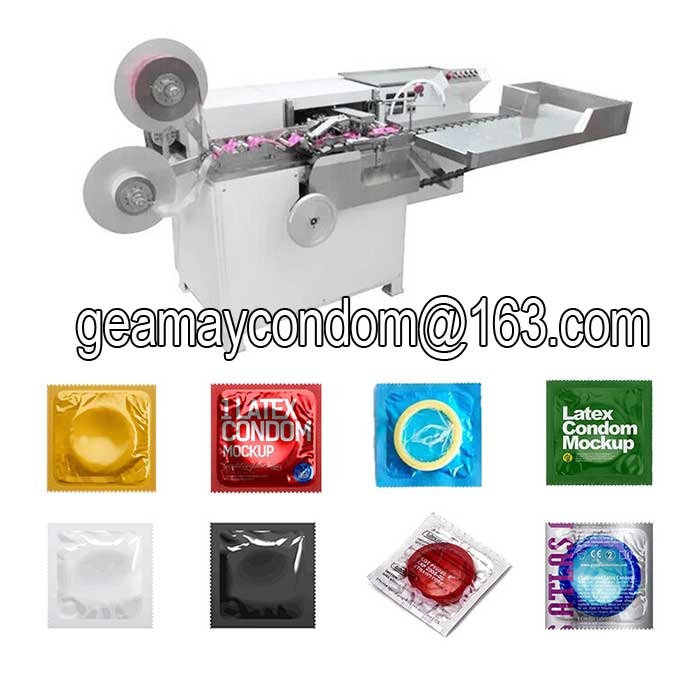
Packaging machine is one of the main type of condom manufacturing machine, Condom Packaging machine specifications as followings:
Machine model: BFB-II condom square packaging machine
Capacity: 180 pieces/minute, 60 pieces per column, range is 130-180 pieces/minute, can be adjusted.
Packaging shape: 55×55mm, sealing width is 5mm.
Machine size: three-dimensional height 1320mm
Width: 1000mm
Length: 1400mm
Three-dimensional weight: 500Kg
Power supply: three-phase four-wire 380V AC 50HZ (the blue wire is the neutral wire)
Motor: Three-phase 380V AC
Heater power: 150W×12
Coating color: milky white
Before use, please investigate and confirm the following matters and understand the use of the machine.
1. Check whether there is any damage during transportation and whether the fastening screws are loose;
2. Try to install the machine in a place with low humidity. When installing the machine, please adjust the front, rear, left and right anchor wires to place the machine stably;
3. The power distribution cabinet of the main body of the machine is equipped with an automatic circuit breaker. Please turn the switch to ON;
4. Press the power switch, press the motor switch, and check the rotation direction of the motor.
There are two motor switches. When you press the two motor switches to ON, the motor will rotate. When it stops, press either of the two switches to OFF to stop. The direction of motor rotation is counterclockwise for forward rotation. If it is wrong, just change the two wires of the three-phase power cord. If you look at the top, you can also see the conveyor belt. If the conveyor belt is running forward, it is rotating forward.
5. Turn the heater switch to ON.
Please set the temperature of the temperature controller (AL808) at 125°C. If the specifications of the packaging material change, please set the temperature adjustment to a temperature suitable for the packaging material.
When the green light on the upper left side of the temperature regulator is on, it means that the power is on for heating. When the green light goes off, it means that the set temperature has been reached and the product can be sealed and packaged.
6Install the packaging materials. The inside of the roll is the bonding surface, please make no mistake. It is equipped with brakes to keep the coil in a stable position, so please use it when exchanging coils. When placing the coiled material, do not loosen the inner shaft retaining ring. In order to prevent the coil from loosening, please tighten the outer retaining ring screws. When the roll material is loose, crawling failure will occur when the packaging material is transported. Please pay full attention to this.
7. After the coil is placed, please confirm the timing of the flower knife and the cutter. Please adjust the synchronous output counter to 5 and the cycle counter for the cutter to 5. If you want to change the number, please press “+” or “-” on the counter to change the flower knife and cutter count.
8. When packaging is in progress, the waste edges after cutting the unnecessary film at both ends will be transported out of the back side of the machine. This is a waste edge cutting device. Please put the waste edge of the conveyor line directly into the carton.
9. When the cutter switch is turned ON, the cutter counter starts to work. When the flower knife switch is turned to ON, the flower knife counting starts to work.
10. When cutting a single product, turn the flower knife switch and the cutter switch to OFF, and place the adjustment partition in front of the cutter electromagnet in the machine.
When the partition is not placed, there are M8 screw holes, which can be pushed in with screws to cut one piece at a time.
11. Circular metal disks are installed on the conveyor belt device. Please place the condom in the center, otherwise it will be caught by the sealing part, so please try to place it in the center of the hole. When all the packaged condoms are caught, it must be that the conveyor belt and sealing roller are out of sync. In this case, please adjust the conveyor belt. When viewed from the front of the machine, there is an adjustment wheel on the right side, and two hexagonal socket screws are fastened on it. After loosening this screw, when adjusting in the forward direction, the position of the condom will become faster; when adjusting in the reverse direction, the position of the condom will move backward.
Note: When adjusting simultaneously, please use fine adjustment to change the position. Please first confirm whether the part through which the lower coil material passes is correct, then make adjustments, and then tighten the screws at the two places.
12. Pressure adjustment method of sealing roller
Please try not to change the pressure of the sealing roller. If there is a difference between the left and right sealing parts of the product, use the adjustment button to adjust the pressure.
There is a collecting ring that seals the roller inside the main body cover. There is a carbon rod fastened on the collecting brush. The carbon rod will wear out after long-term use. Please loosen the carbon rod and pull it forward through the tight Fix before use.
There are two collector ring wirings on the outside of the roller, which are the thermocouples used by the temperature regulator. The two wirings are blue and red. If these wires are connected incorrectly, the temperature cannot be adjusted. Therefore, be sure to connect them before wiring. After marking first, connect the wires as they are.
13. Adjustment method of flower knife and cutter device
Please refer to the instructions on the picture for adjustments when the cutting condition is poor, how to correct the horizontal bending of the horizontal seal, and when the positions of the flower knife and the cutter are changed.
14. Adjustment methods for vertical and horizontal shearing and waste edge cutting
The rear side blade is fixed. Cutting is performed by the gentle push of the spring on the front side blade. If cutting cannot be done at the center of the longitudinal seal, please adjust the rear cutting position. When moving the position, you can simply change the position by loosening the screw of the cutting blade, and push the sliding part of the cutting blade with the front spring. Or rusted, poor cutting will occur, so please pay attention to the shaft and the sliding part of the cutting. Waste edge cutting is also adjusted on the front cutting edge.
15. Adjustment method of rubber roller for stretching
When the packaging material is in the longitudinal sealing position, the roll must be neither tight nor loose. Adjusting the large roller can change the strength.
The method for adjusting the large roller is to loosen the four screws, then loosen the four loosened parts of the pulley, and stretch the rubber roller to increase the tension when turning clockwise. When turning counterclockwise, the pulling force becomes weaker. After stretching and adjusting, do not forget to tighten the four screws. The rubber wheel of the upper belt should also be placed in a position with appropriate tension after adjustment.
16. Main shaft cam
There are six micro switches on the main shaft
The first cam from the top: flower knife cam, each product lace tooth.
The second cam: the cam used in the synchronous counter. It counts the cutting of several consecutive packages and can also be used for production counting.
Third cam: Large in shape, further away. This is the timing cam for the oil pump.
The above three cams play different functions. When the cam is misaligned, please correct it according to the original mark and tighten it. When the micro switch fails, please replace it with a new one. The assembly position of the micro switch is shaped into a long hole for easy adjustment.
17. Apply butter to the drive gear
Applying butter only once is enough, it is best to apply it once a week. Due to the lack of butter, gear wear will occur in a short period of time, so please be very careful about abnormal sounds, vibrations, etc.
18. Please fill the same part of the floor heater roller with oil.
There are small oil nozzles on both sides of the shaft of the main heater roller. Please pay attention to filling the oil regularly, preferably once every three days.
Welcome inquiry us if you interest of this condom sealing machine, we also can help you build your own condom plant: our email: [email protected]


